Printing a test page in Windows 10 is pretty simple for any beginner or advanced computer user. Most printer brands like HP, Canon, Epson, and Samsung all provide their own versions of a printer test page but in this article we are going to show you how to print one in Windows 10.
Why print a test page?
Test pages allow you to check your ink levels and printer quality by printing a document that has all sorts of different colors and elements. It also gets your new ink cartridges flowing before printing any important documents.
Printer test pages are usually just images or PDF files that allow you to test your printer.
Print a Test Page in Windows 10
To print a test page in Windows 10…
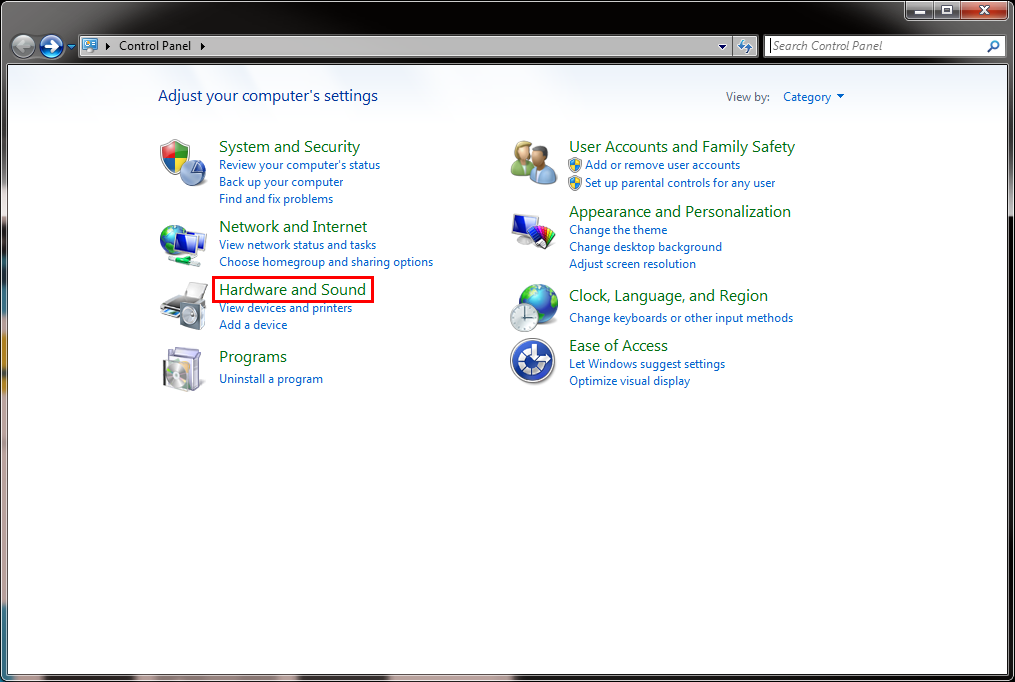
Open up your control panel and look for the Hardware and Sound link.
Click this link to head to the hardware and sound section.
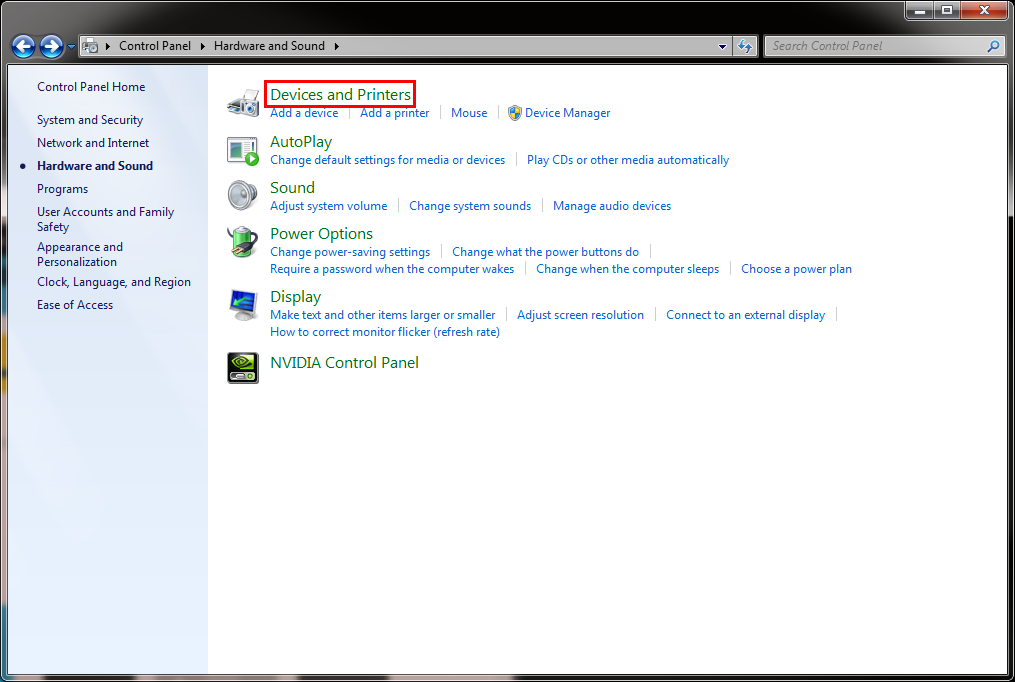
At the very top, you will find the Devices and Printers link which will take you to a management console where you can see all of your current peripherals and printers.
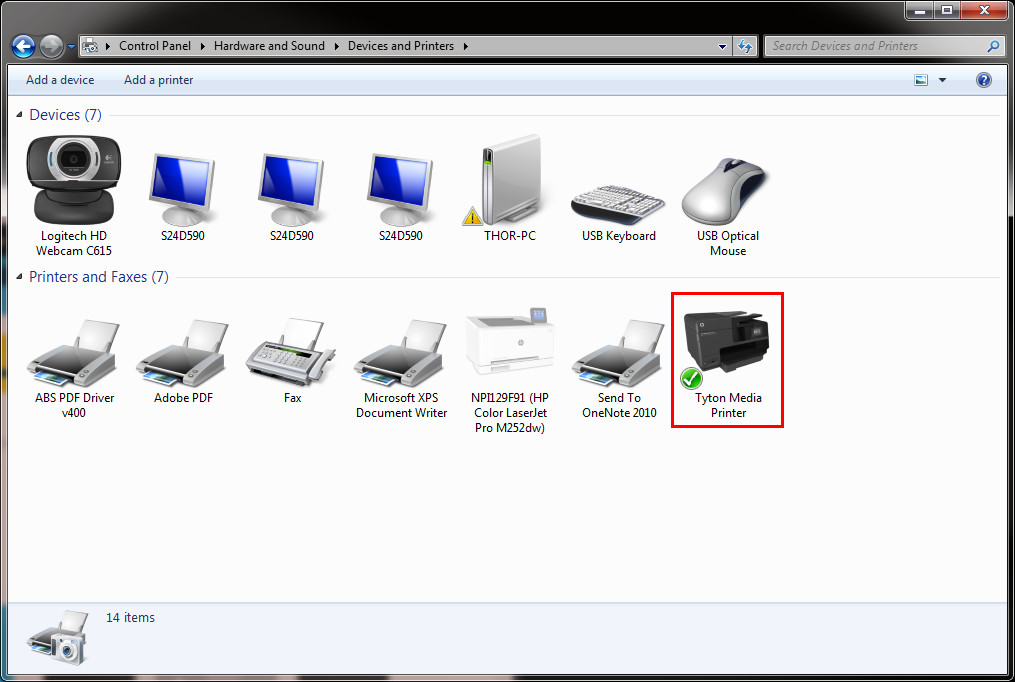
Once you are on the devices and printers console, find the printer that is the current default printer.
It will have a green checkbox on it showing that its the default printer.
Right click on the printer and choose ‘Printer Properties’.
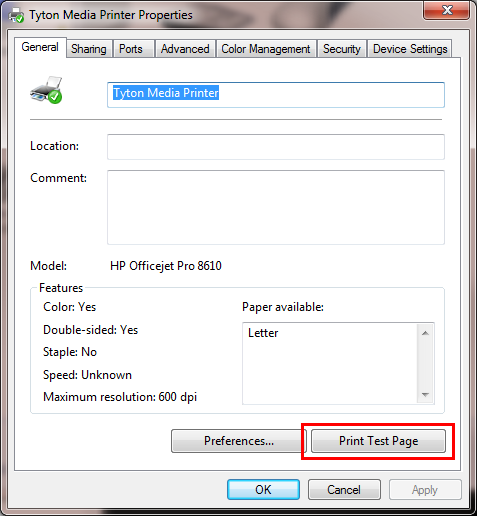
This opens up the printers settings where you can change the name, ports, device settings and more.
On the very bottom right of the panel, you will see a Print Test Page button which will send a test page to your printer.
Video:
Another Method
You can also print test pages really easily by using this website and choosing a black test page or a color test page. It will print one of our beautiful test pages that really shows you how your printer is doing.

Leave a reply